1. Give Forge World a lot of money.
2. Open the bag at a table in the Collectible Card Games section at Origins to look at all the pieces. Fly fuselage around, making swooshing noises.
3. Give Forge World more money to get Imperial Armour Aeronautica so I can have the rules for the Avenger.
4. Drive home.
5. Eat dinner.
6. Clear space in workshop for a very large new project.
7. Remove the pieces from the bag and lay them out in rough order. Inspect the pieces for warpage and obvious faults. This is common to all resin kits that I have built, it is the nature of the material and casting process. There were no gross defects, and only the landing gear strut and one las-cannon were slightly warped.
8. I cut the pour stubs off, and used sandpaper and files to clean up the leftover pieces. When that was done I dry-fit all the pieces and began the process of refining the fit, and noted any gaps that will need attention after assembly. So far the only bad gap is between the fuselage and the nose section

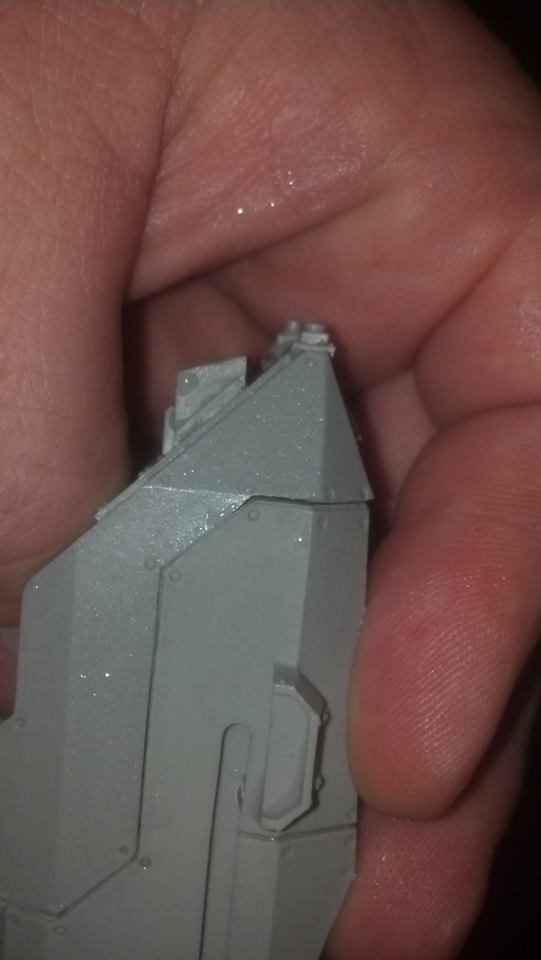
Depending on how bad they are after assembly, I will use either Squadron putty, green stuff, or Liquid Green Stuff to fill the gaps.
9. Then I laid out the pieces in rough order, took a picture,

And posted the picture to my Facebook page.
10. I then filled in the few pin holes that I saw, and removed the mold lines.
11. While waiting for the LGS to harden I chose colors. The bottom will be Calgar Blue, while the top will be Deathclaw Brown and Warpstone Glow.

12. Then I washed the pieces in warm water with dish soap to remove the mold release agent, then laid them out to air dry.


I am using my cell phone for the pictures, so please forgive the picture quality.
I also decided to do this after I had already trimmed off the stubs, so sorry for the lack of pictures in the steps before. I promise more photos for the rest of the way.
Any and all advice and criticism are welcome.
No comments:
Post a Comment